VROPs for Horizon provides end-to-end visibility into key User session statistics that make it easy for Horizon admins to visualize and alert on performance problems impacting the user’s of their environment. One of the key metrics used in determining how well user’s are connected to their virtual app or desktop session is Session Latency (ms), as it most visually impacts the user’s perspective of their session performance. The lower the session latency, the quicker video, keyboard, and mouse inputs are redirected to and from a user’s endpoint client, giving the user a more native-like PC experience.
As the latency trends higher (>180ms), the experience begins to degrade, and the user can begin to notice “sluggishness“ – slow keyboard, mouse, and video responsiveness.
VROPs for Horizon gives us direct visibility into when these issues are occurring across all of the Active User Sessions of the Horizon View environment. However, once the session becomes inactive, it will go into a stale object state and be removed from vROPs during a clean-up window.
To be able to view this information historically on Pools and User objects, you can create Super Metrics that simply maps the session latency to the objects you want to report on.
Creating the Super Metric
To create the Super Metric, Navigate to Administration -> Configuration -> Super Metrics. Click the green + sign to create a new Super Metric.
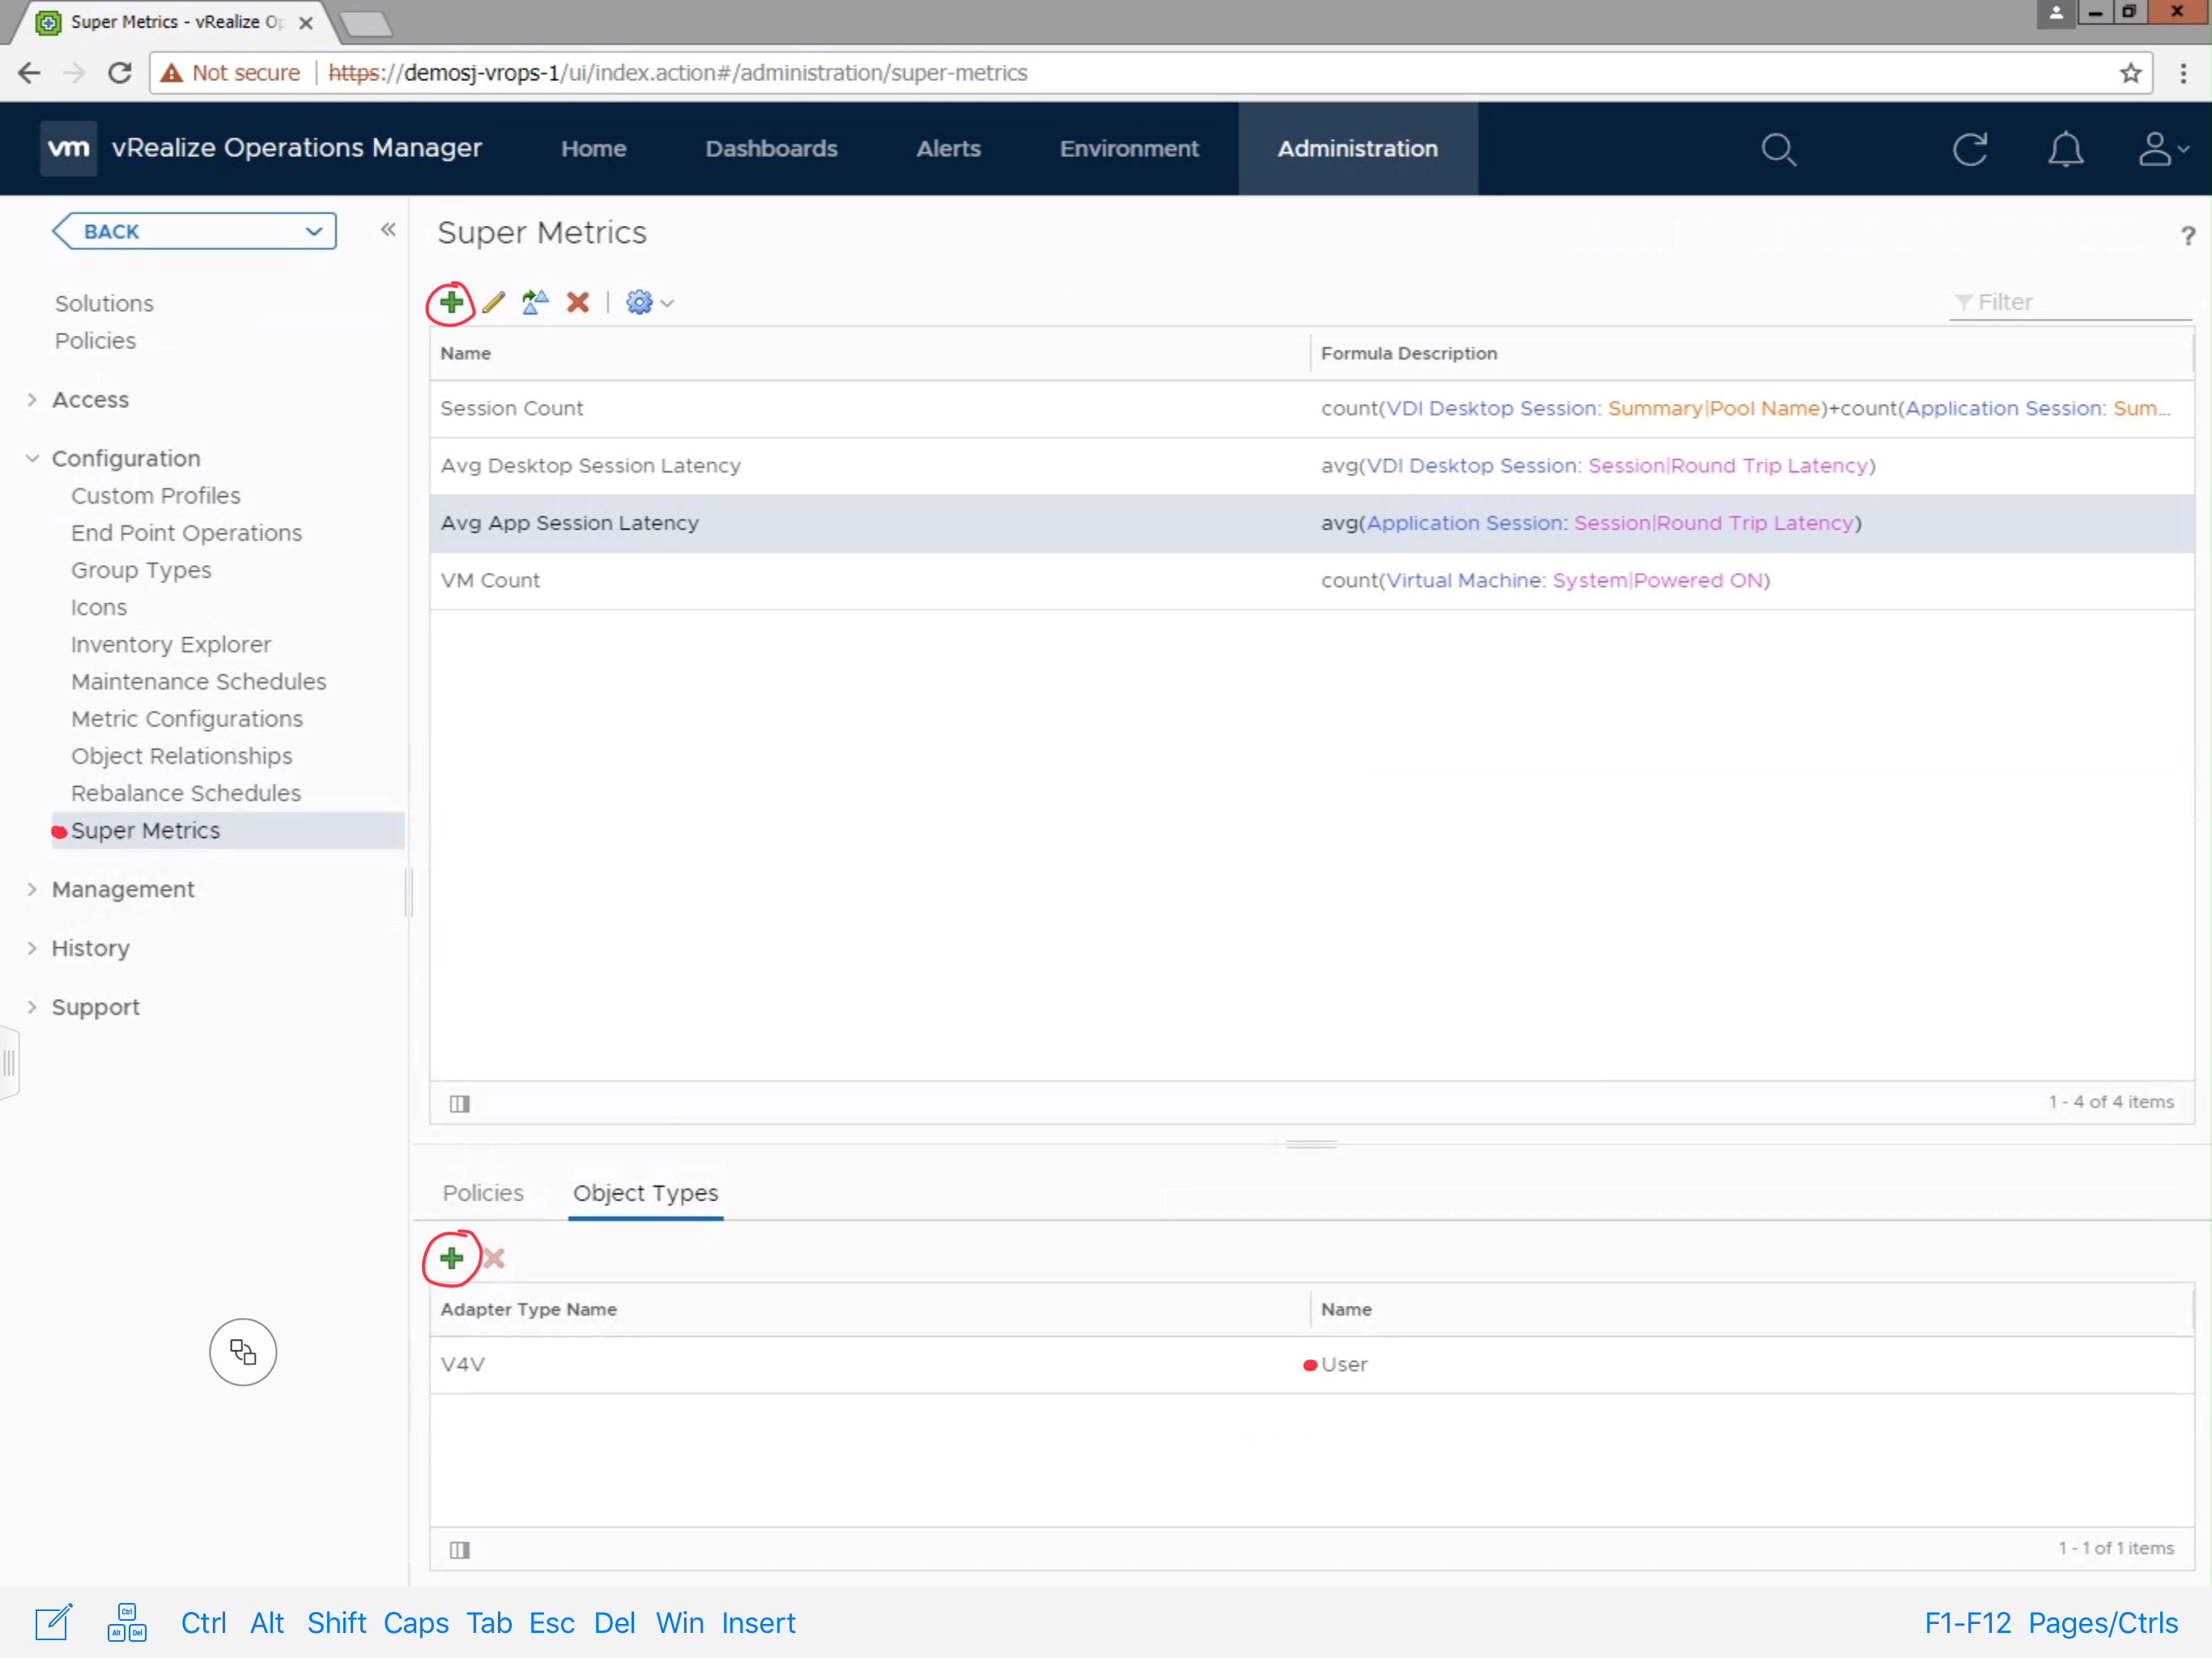
Provide the Super Metric a unique name, in this case we are using “Avg App Session Latency”. Search for the “Application Session” Object Type, and click “Round Trip Latency (ms)” to add it to the Super Metric. Since, we are looking for the average latency, select “avg” from the available functions list, making sure that the average function applies to the metric by encapsulating it parenthesis as demonstrated in the image below. Click Save to finish the Super Metric.

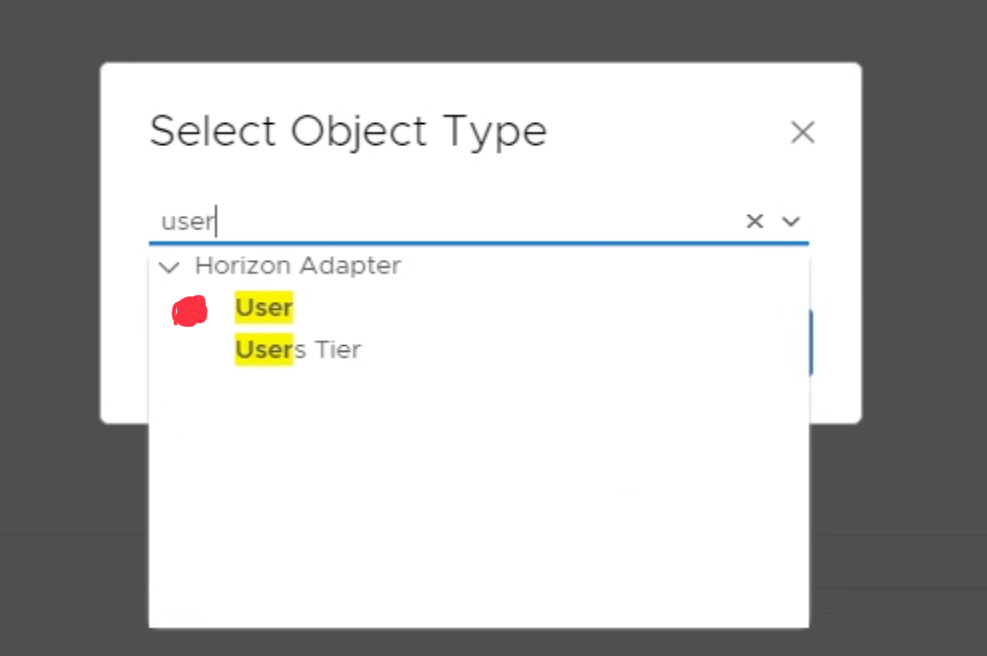
Next, you will need to add the Super Metric to the “User” object type. Click the green + sign under the “Object Types” section. Search and select the “User” object type.
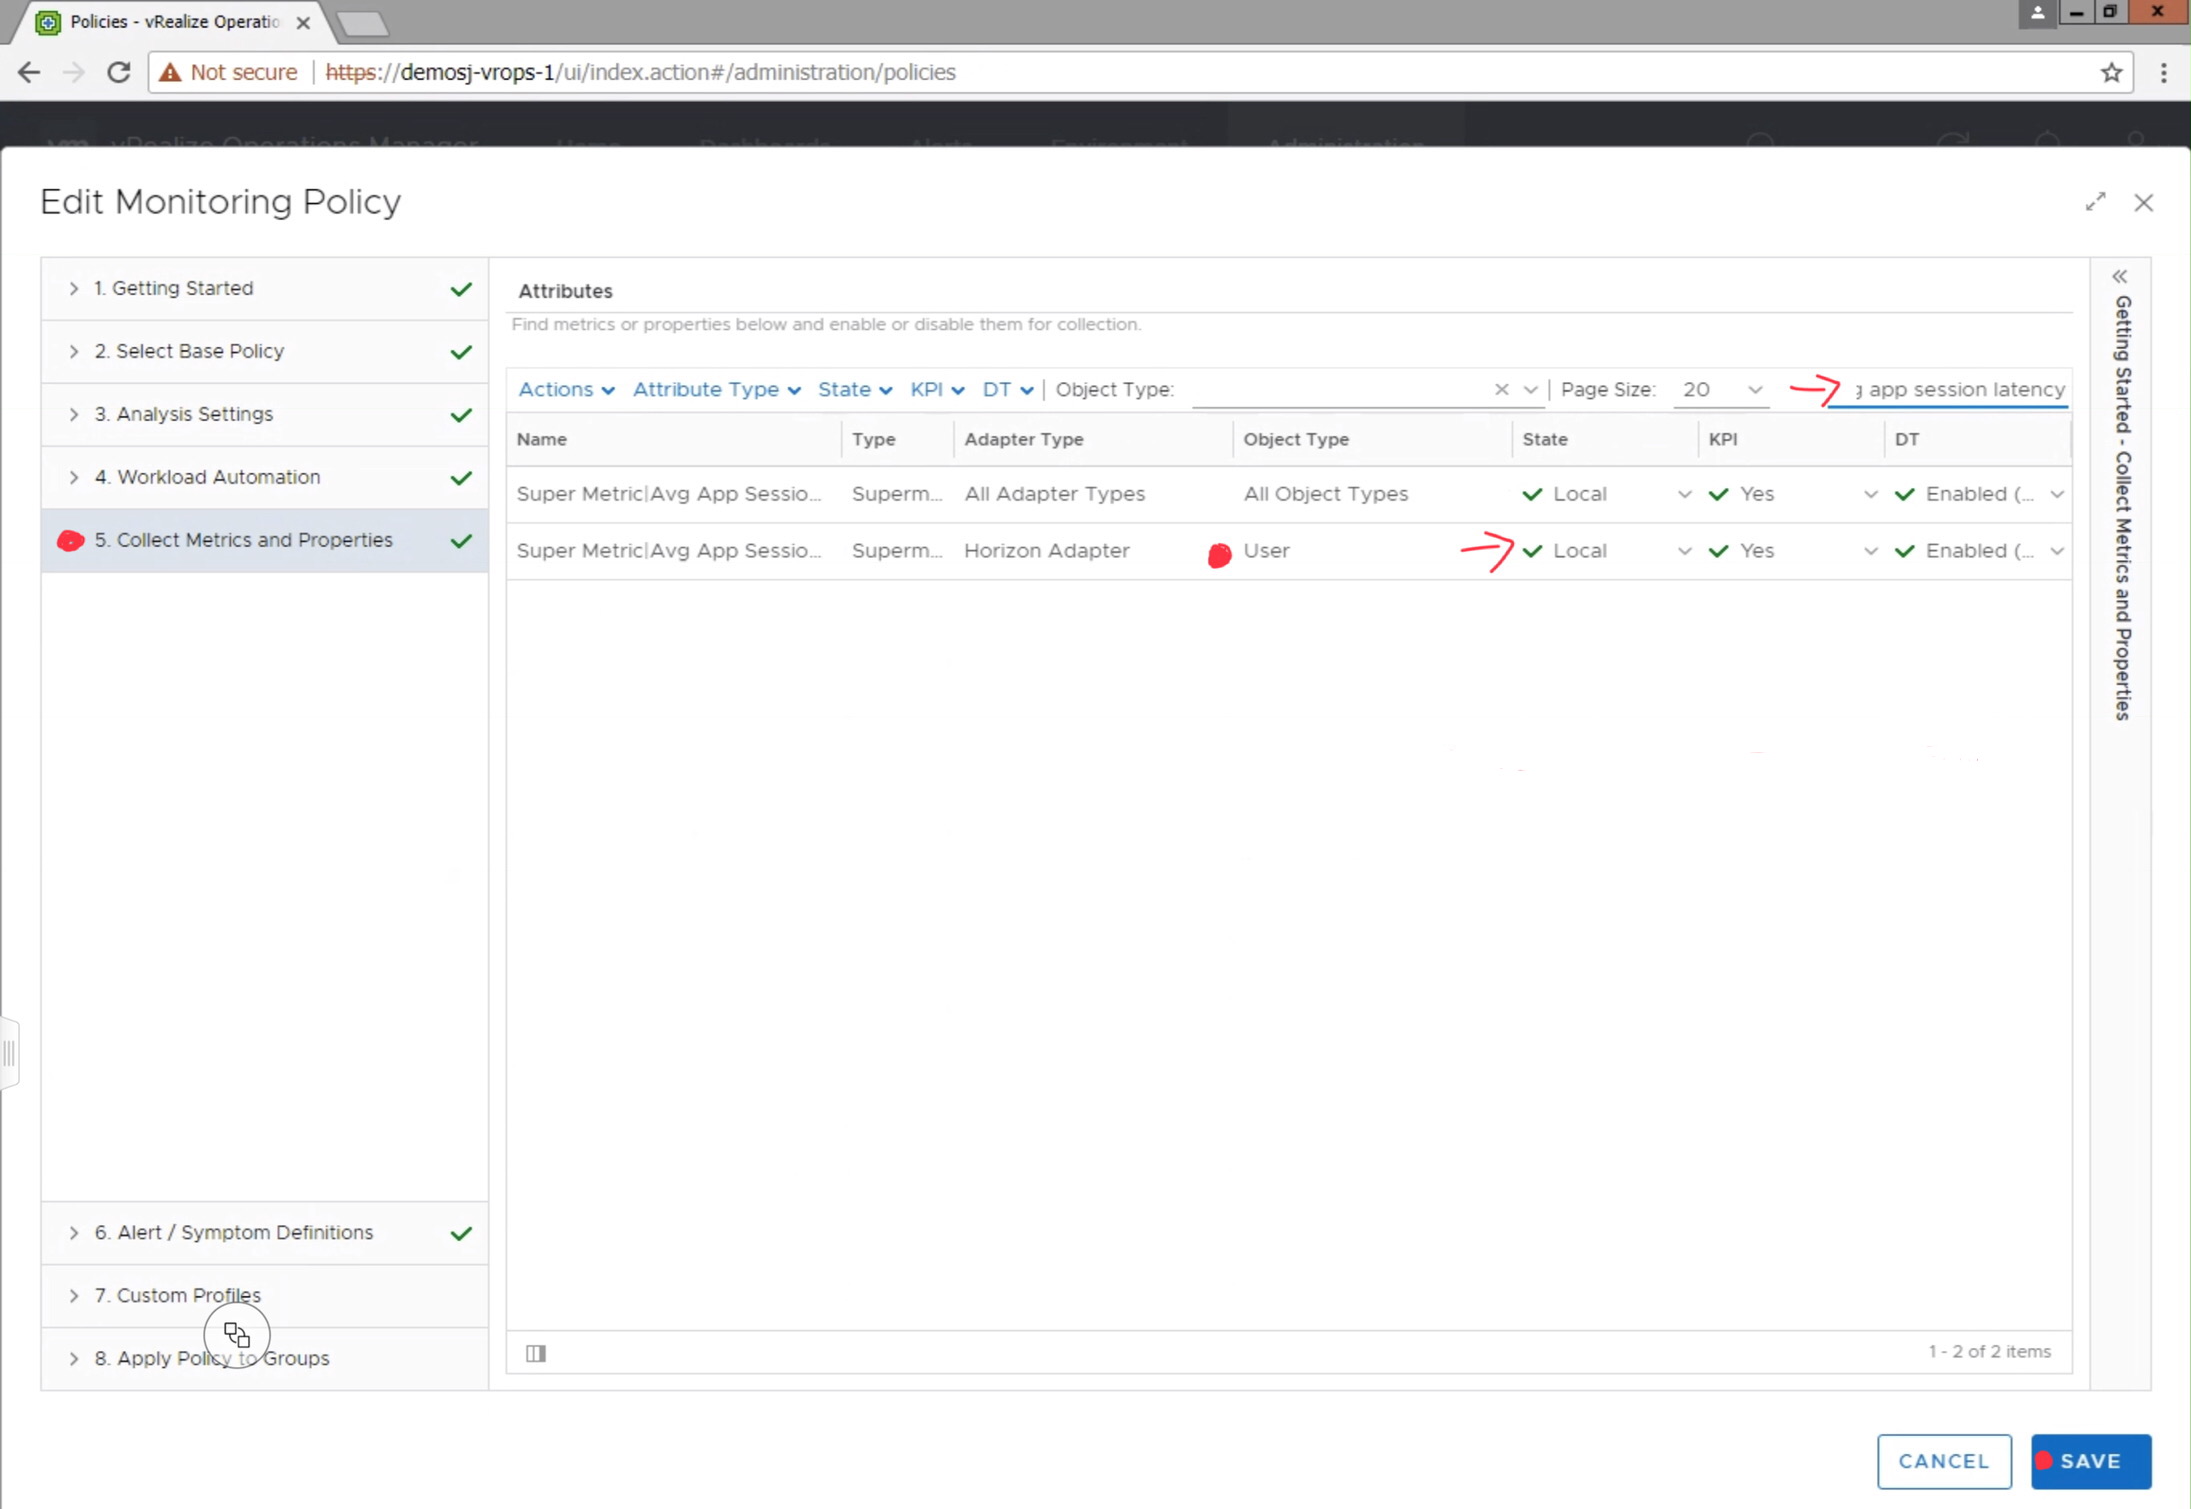
Before the Super Metric will begin collecting data, you will need to navigate to Administration-> Policies, and edit the active monitoring policy to enable the metric for collection.
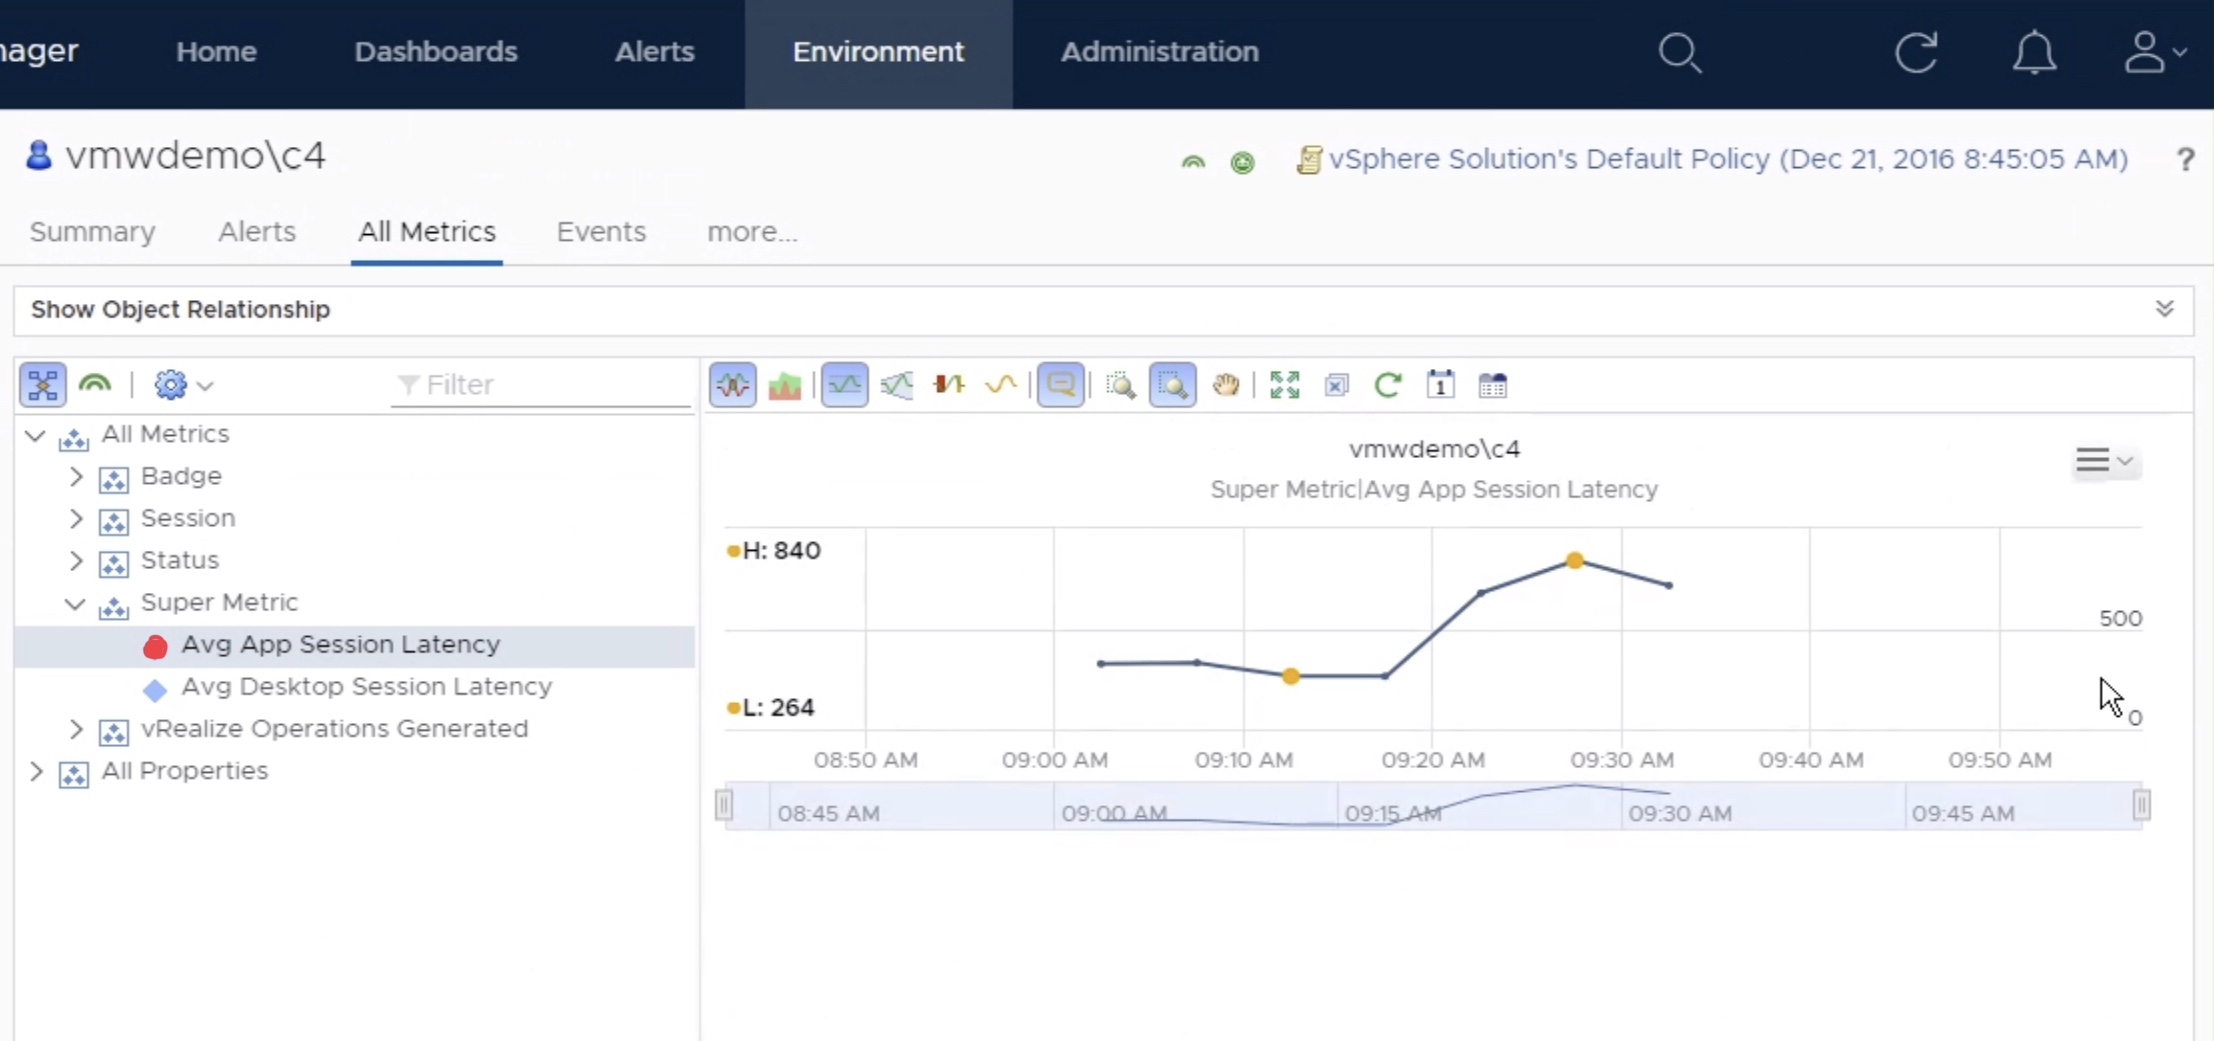
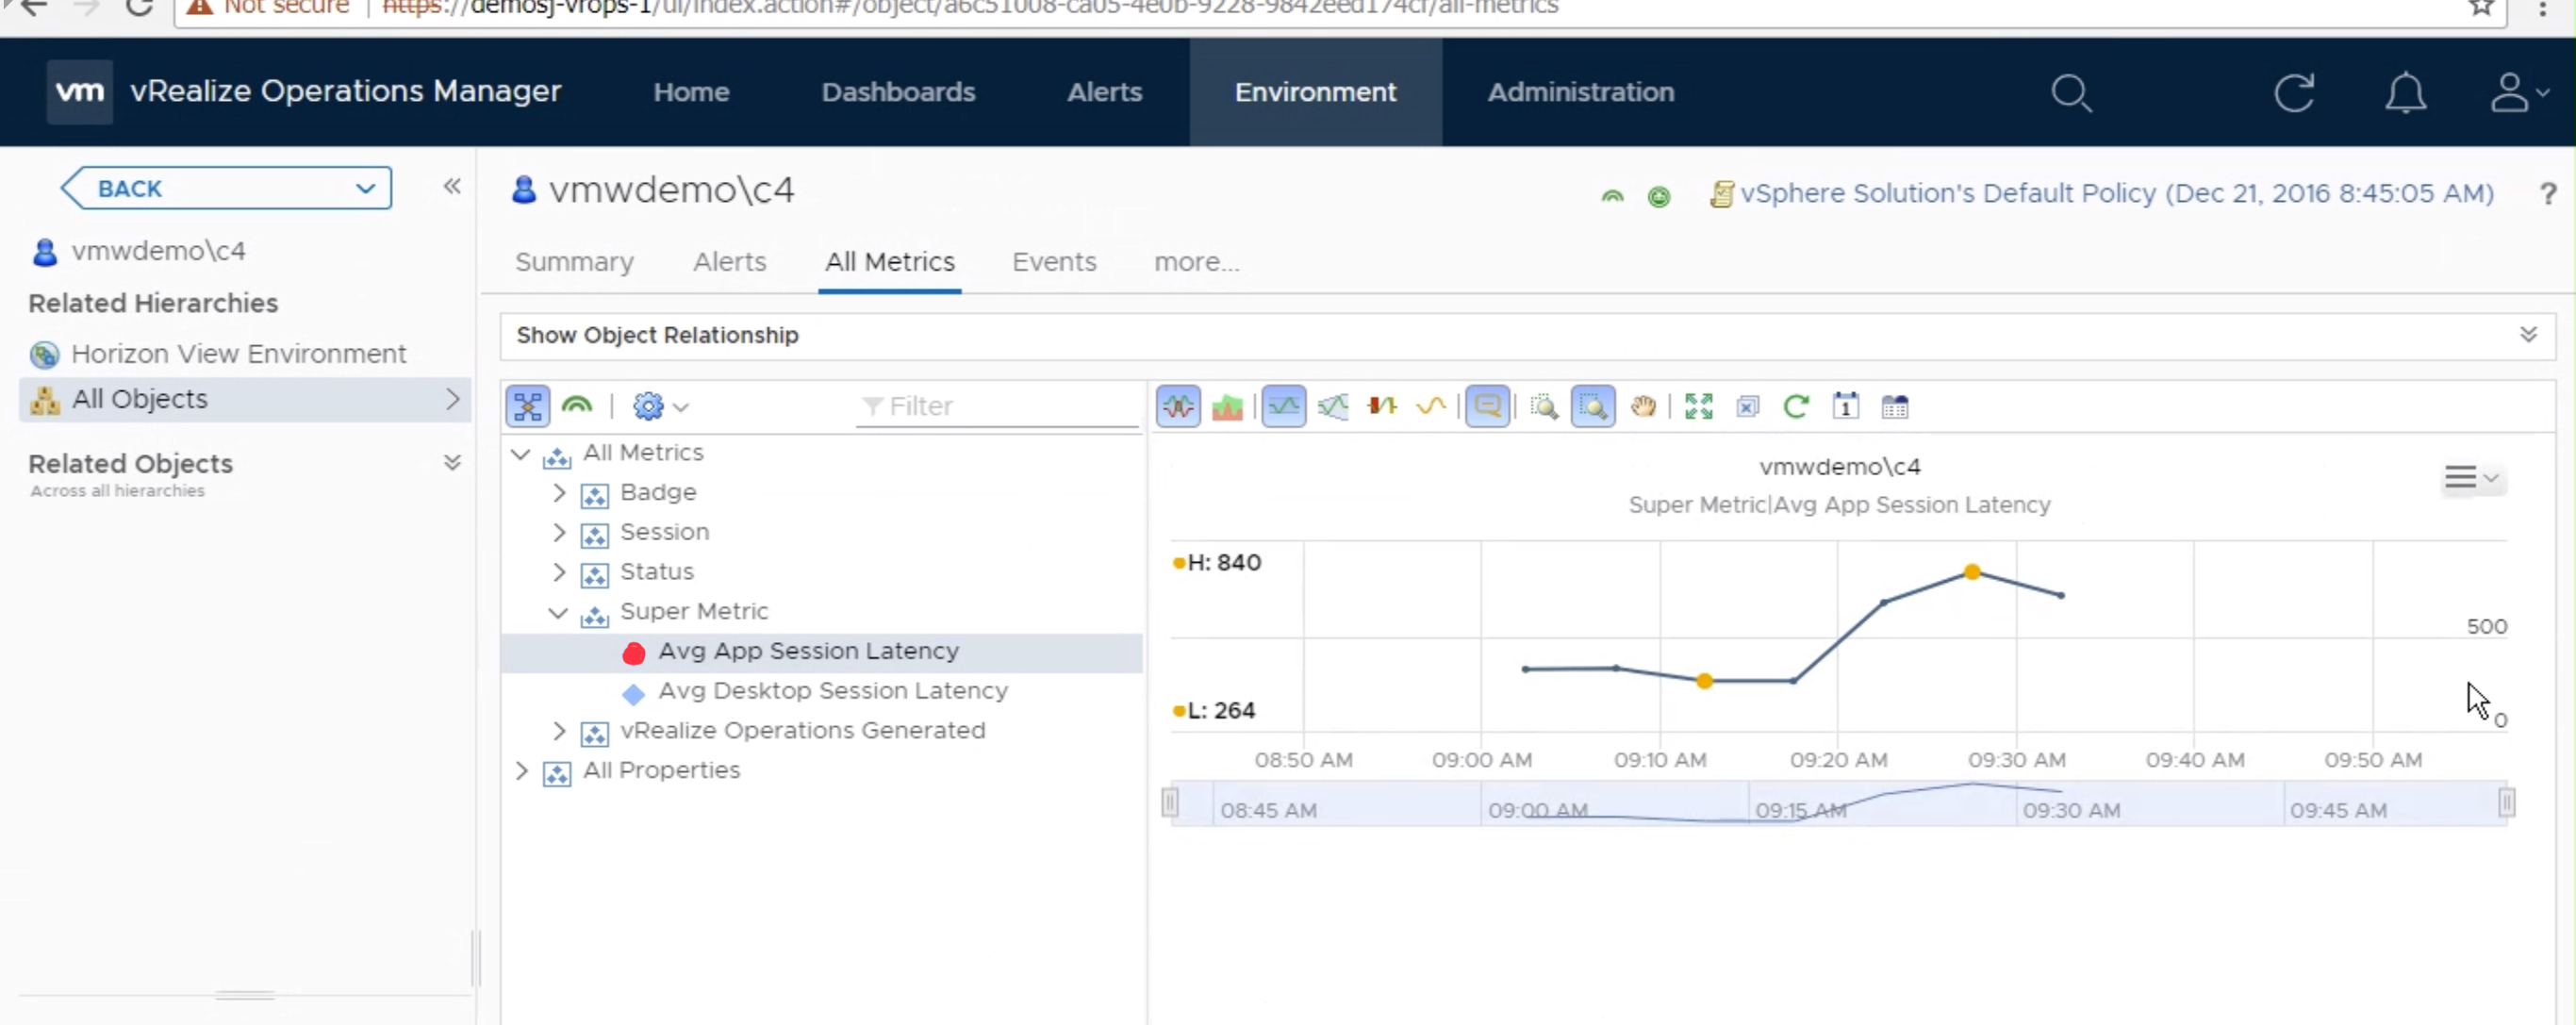
Once the metric has started to collect data, you can view the data on a individual “User” object by selecting “All Metrics” -> Super Metric -> select metric.
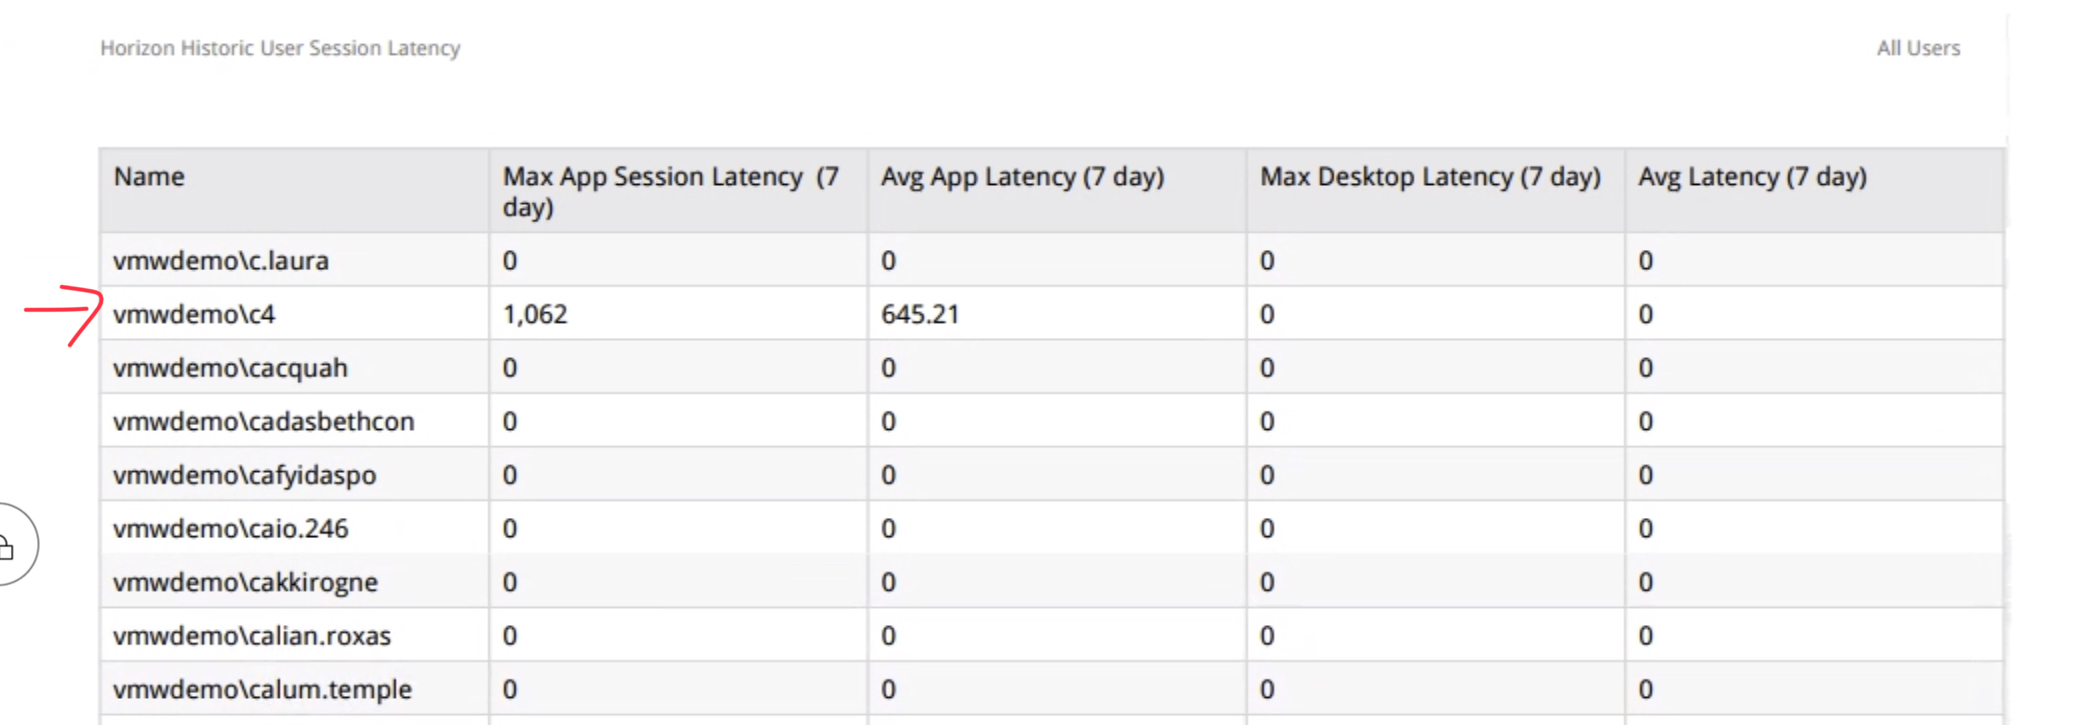
You can also create custom Views that display the historical latency for all users of the environment, as well as perform simple roll-up statistics.