Disclaimer:
This document is not intended to show the complete process of how to setup and install UEM, or highlight all of the possible AD policies that can be leveraged for customer deployments. It is intended to show a simplified process of turning a Default Windows profile into a Mandatory profile, recommend GPO polices to simplify management and clean up of profiles, and redirect key folders to keep user data after logoff. UEM will be used to deliver as well as capture user application settings.
App Volumes Notice: If leveraging this methodology for an App Volumes deployment, make sure that the agents are installed in the correct order. The order of installation is View Agent, UEM agent, and App Volumes respectively.
** As new versions of UEM are released, some steps maybe simplified over time.
Creating the Mandatory Profile:
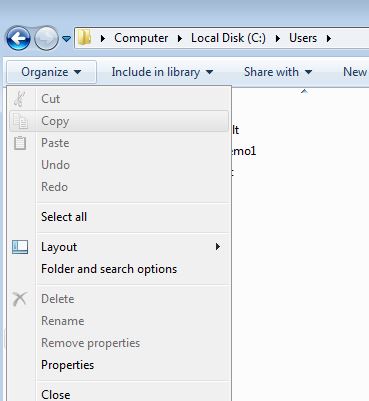
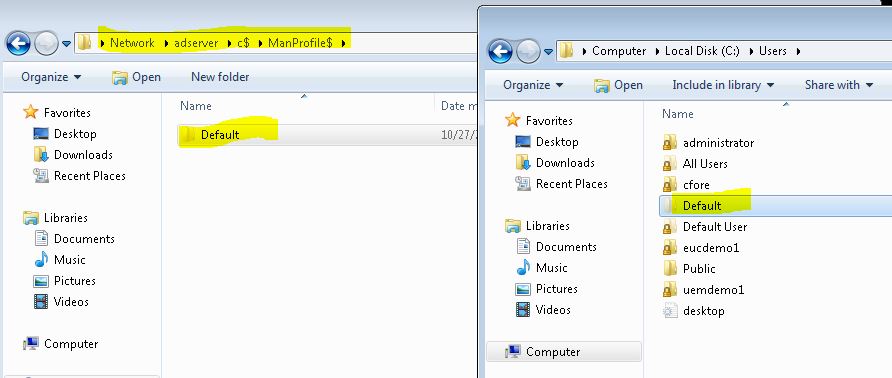
Step 1: From a Windows 7 Desktop, navigate to C:\users\.
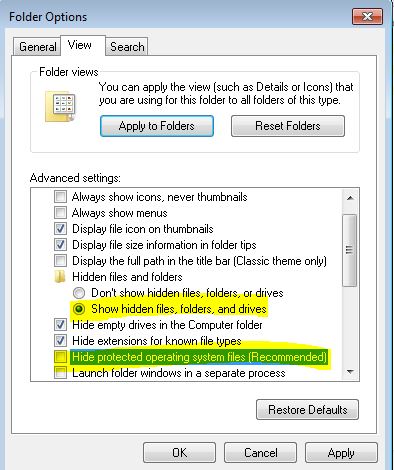
If the Default profile folder is not visible, change your default folder view options. Choose Show hidden files, folders, and drives, and uncheck Hide protected operating system files (Recommended).
Step 2: Copy the Windows 7 Default folder to your Mandatory profile network share.
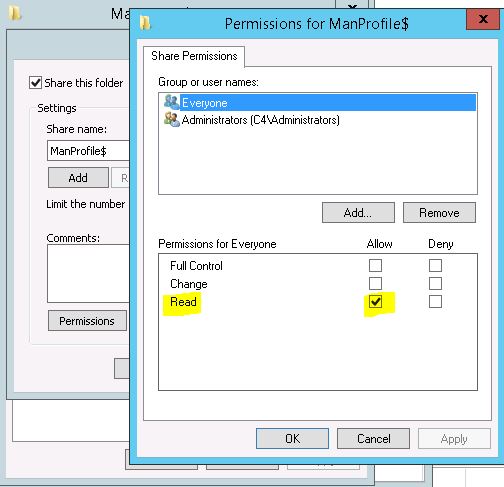
Make sure the share is set for Everyone to have a minimum of Read access.
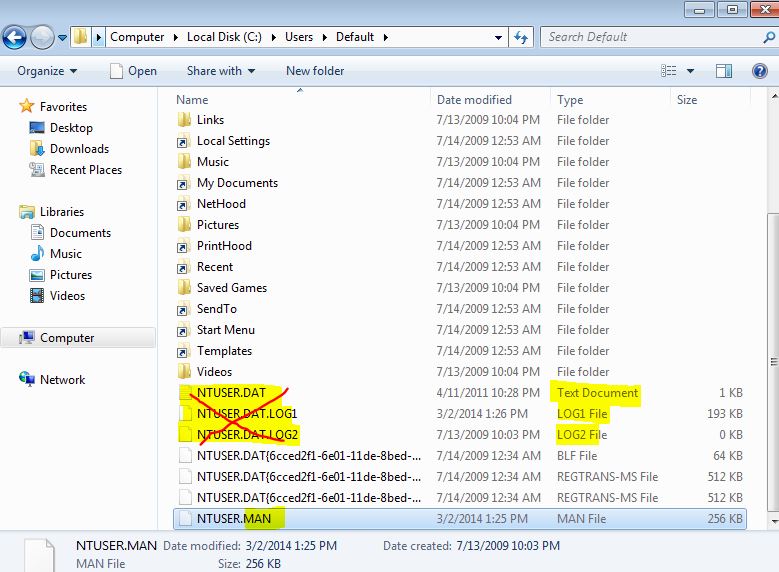
Step 3: Open the Default folder copied to your network share. Rename ntuser.dat to ntuser.man. It is also recommended to delete the following files:
- DAT Text Document
- DAT.LOG1 LOG1 File
- DAT.LOG2 LOG2 File
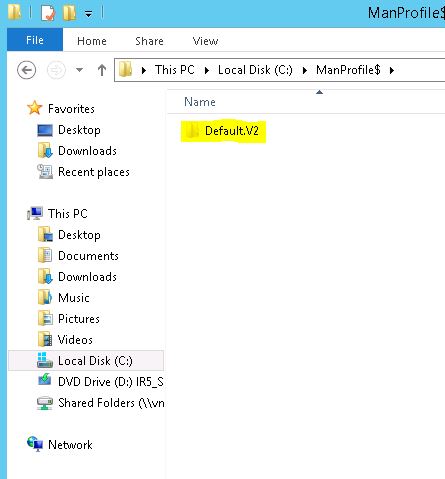
Step 4: Rename the Default folder to Default.V2 for Windows 7+ OS users.
Optionally you can create a copy of the folder and leave the Default name without the .V2 for XP users.
Create Mandatory Profile Summary:
At this point you should have clean mandatory profile that was generated from the Default profile available in Windows 7. That profile was copied to a network share, and we verified that the Everyone group has the Read permissions on that share. The ntuser.dat file was renamed to ntuser.man, and the extra files were deleted. The folder was renamed to Default.V2 for Windows 7 + OS users.
By leveraging the Default profile, we have removed a lot of steps typically involved in the creation of a mandatory profile. This will also help to speed up user logins, as well remove additional variability from the desktop environment.
Enabling Active Directory group policies to leverage the Mandatory profile and folder redirection.
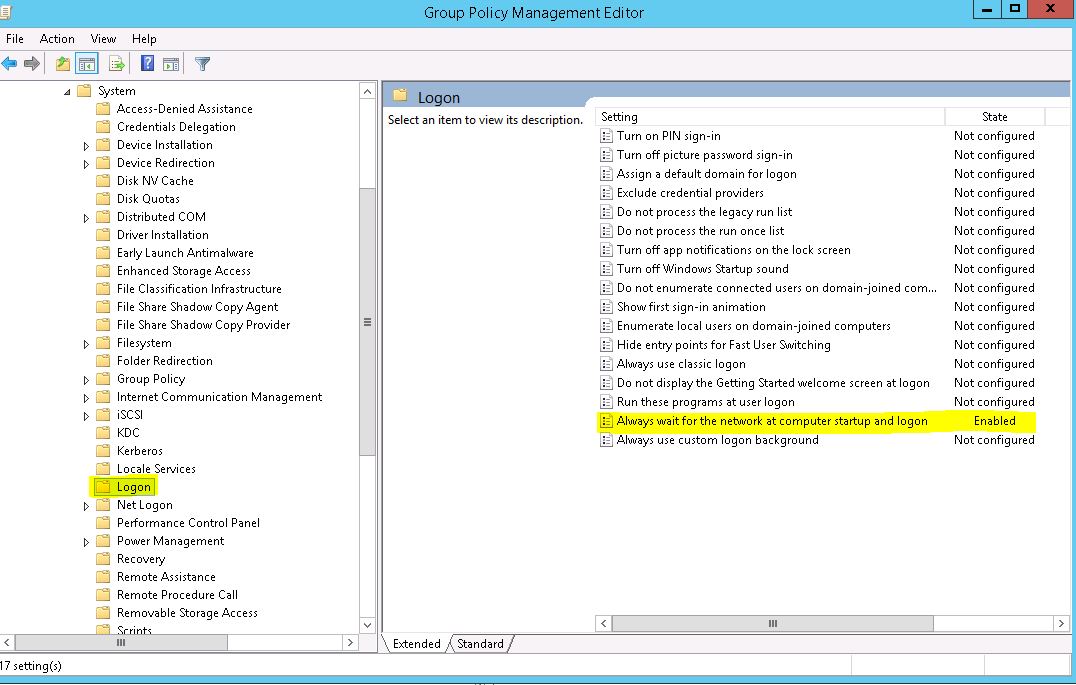
Step 1: Set the OU Computer Configuration policy to “Always wait for the network at computer startup and logon” to Enabled.
In the group policy editor, navigate to Computer Configuration-> Policies -> Administrative Templates-> System-> Logon, and change the policy setting to Enabled.
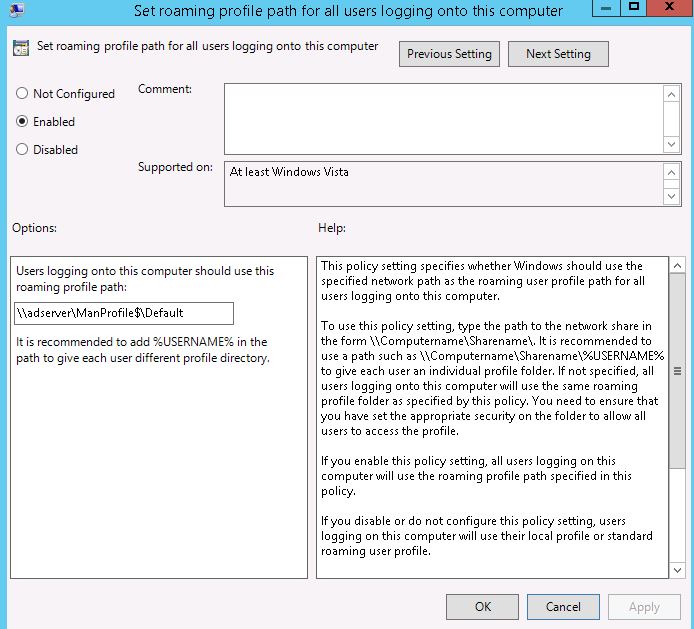
Step 2: Edit the Computer User Profiles policy, “Set roaming profile path for all users logging onto this computer” to Enabled, and specify the network share path.
In our example the share path is\\adserver\ManProfile$\Default. **Do not include the .V2 in the folder path.
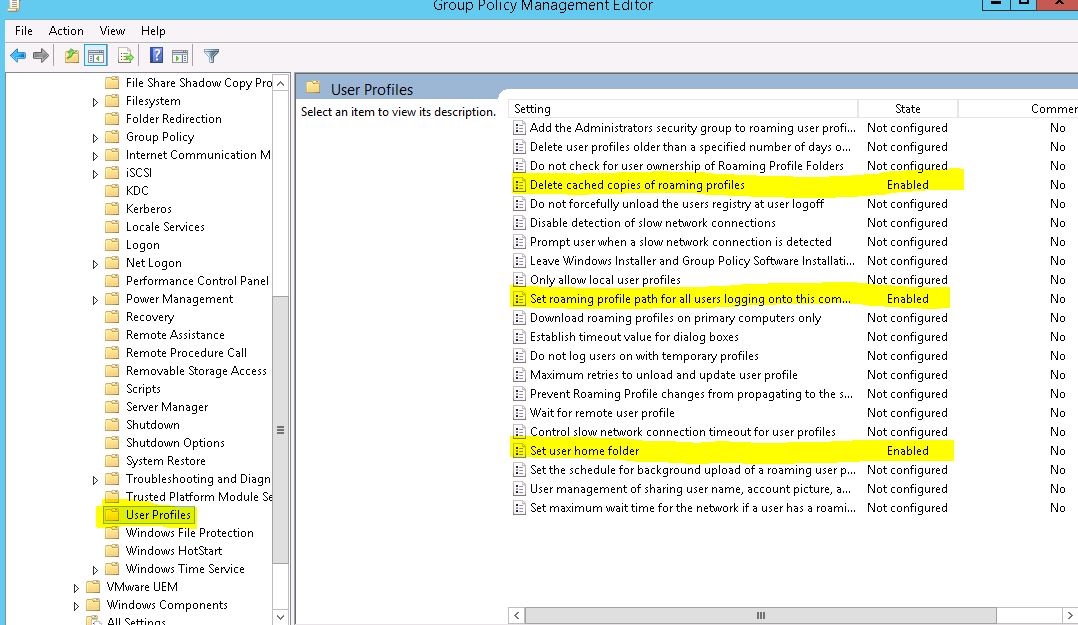
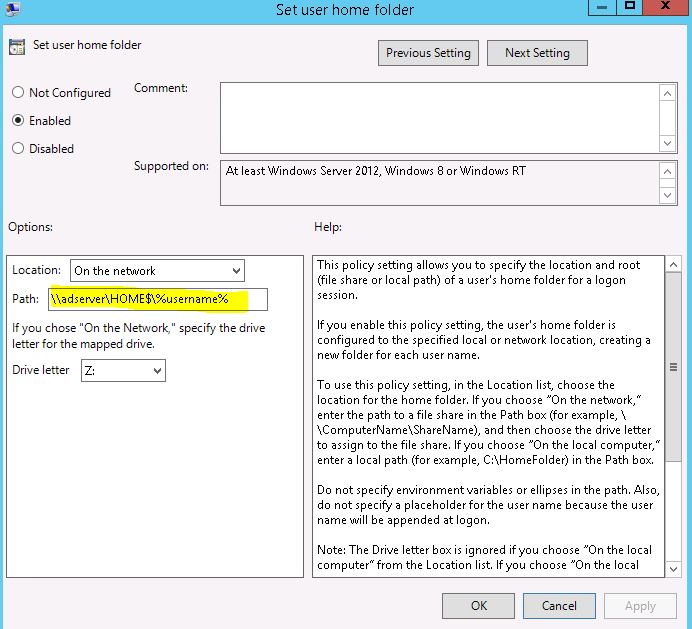
Step 3: Edit the Computer User Profiles policy to configure the user’s home directory path.
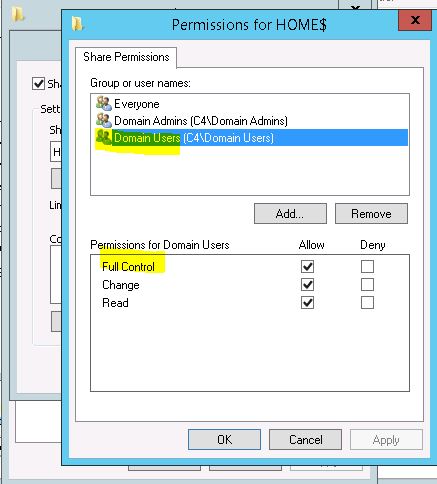
In our example the path is \\adserver\HOME$\%username%. You will need to make sure to set the proper sharing and security settings, so that the users can properly access their home folder. This process is not covered in this document, but can be found through various resources. Domain Users should have Full Control access to the share as shown in the pictures below.
Step 4: Optionally you can set the Computer policy “Delete cached copies of roaming profiles” to Enabled.
This feature will make sure the users profile folder is automatically deleted on logoff. If you are implementing a non-persistent virtual desktop environment and the refresh on logoff feature is enabled, this feature may be considered redundant, as the refresh process will automatically get rid of the user’s profile folder.
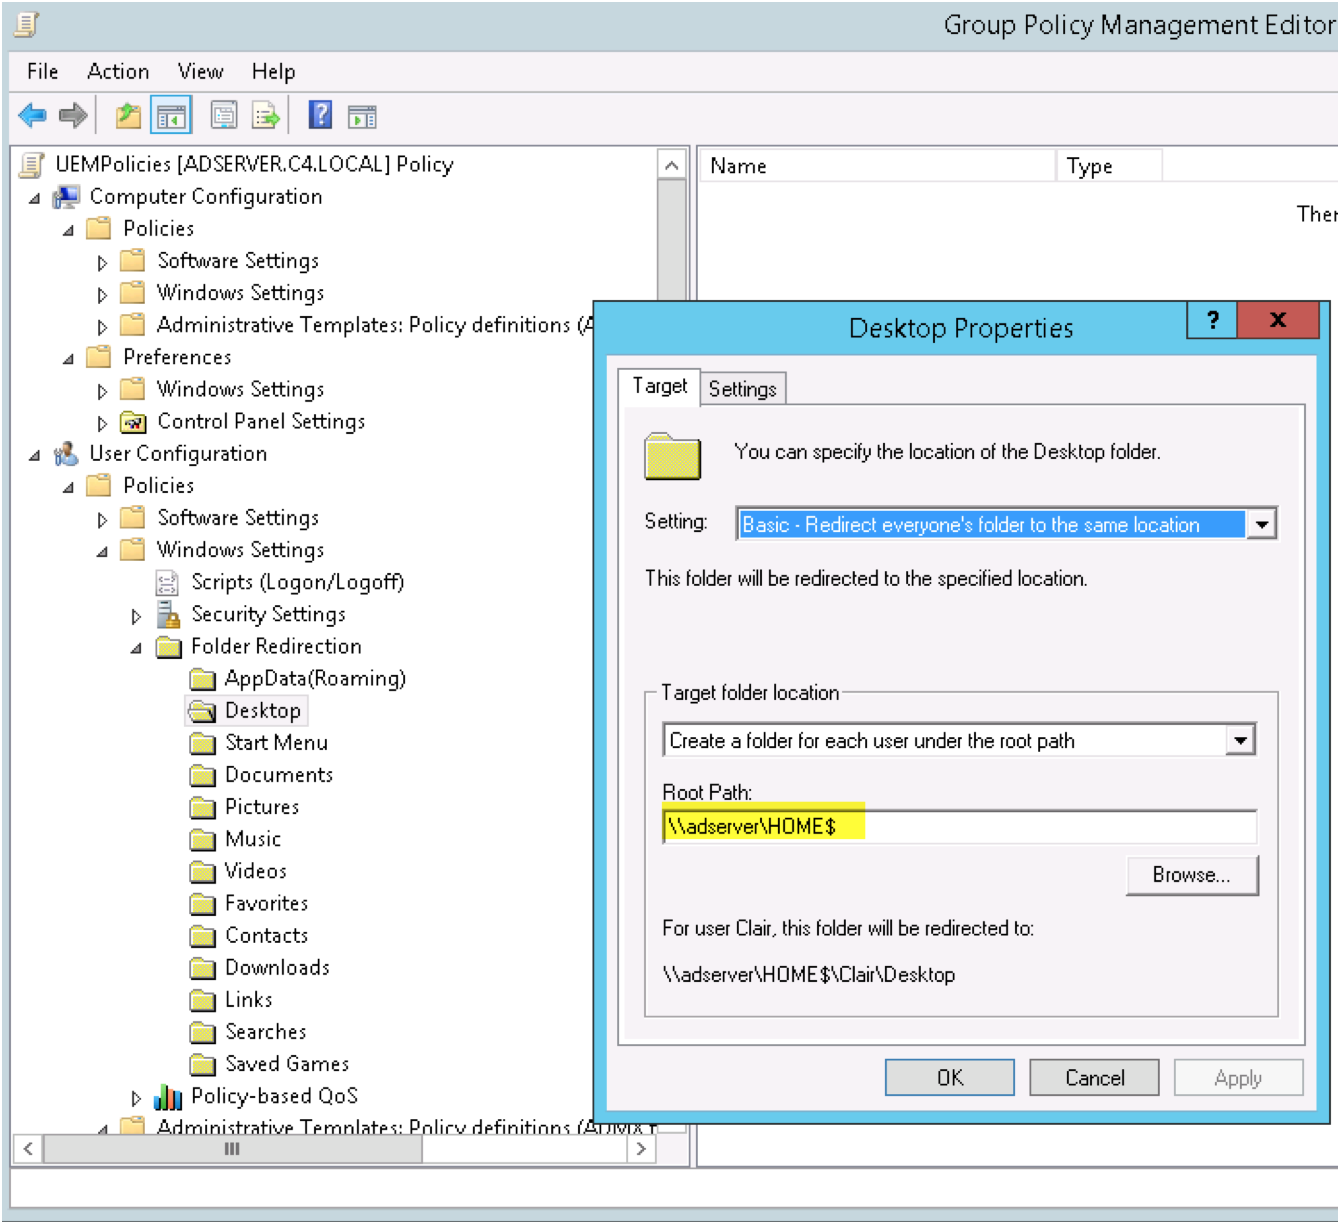
Step 5: Now we must set the User Configuration policy to redirect the users Desktop and Documents.
In the GPO Management Editor, navigate to User Configuration->Policies-> Windows Settings-> Folder Redirection-> Desktop. Right-click and select properties. Under Setting: select Basic – Redirect everyone’s folder to the same location. Under Target folder location, make sure that Create a folder for each user under the root path is selected. Set the Root Path to the users Home$ directory share. In our case the share is \\adserver\HOME$
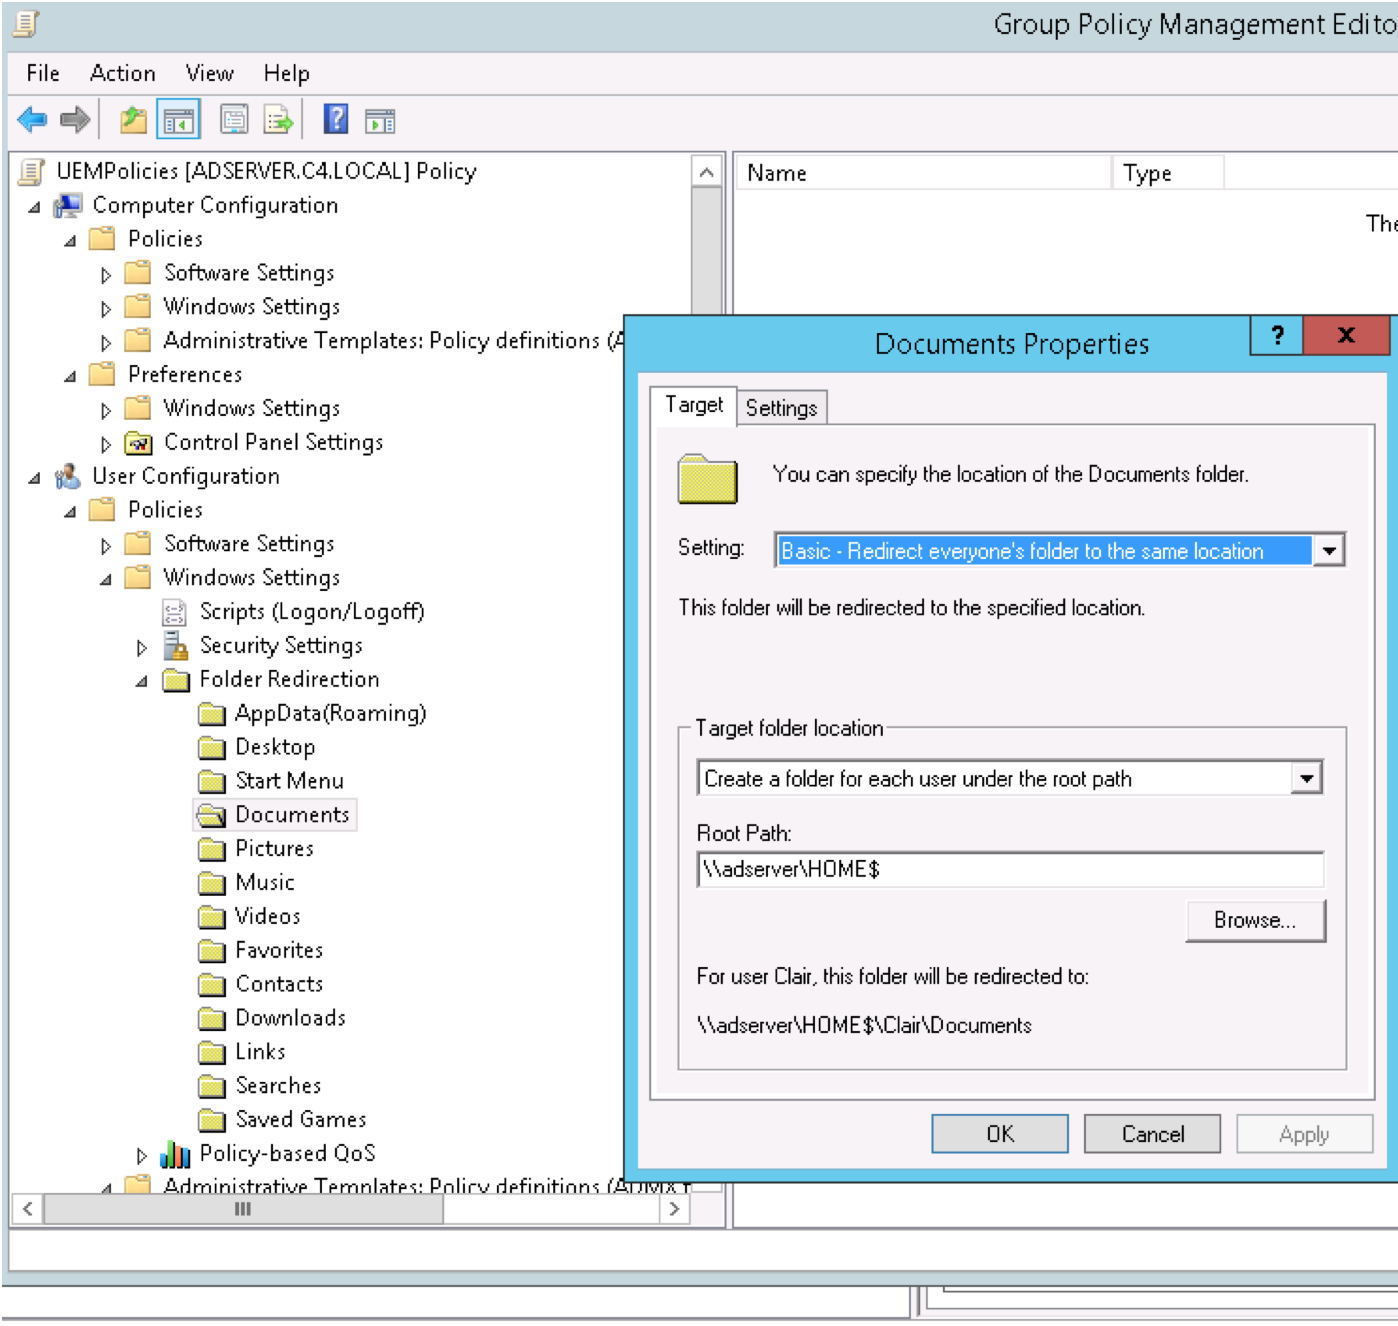
Step 6: Perform the exact same procedure as above for the Documents setting.
Enabling AD GPO policies Summary:
At this point we have enabled multiple Computer policies for Network Logon, as well as User Profiles. The policies tell our computer to wait for the network at logon, and when a user logs in, force them to use the mandatory profile we created in part one.
We also specified that we want to redirect the user Desktop and My Documents to a user network HOME$ share. This will allow changes made to the Desktop, and files added to My Documents to follow them between desktops, whether they are physical or virtual.
Now we are ready to leverage UEM to deliver and maintain personalized app settings for the users.
Working with UEM to deliver a persistent experience:
This portion of the document assumes you already have UEM deployed in your environment. For guidance on installing UEM, see the UEM Install Guide in the Reference section.
Why Horizon UEM:
VMware UEM is able to deliver default or customized application settings directly to the user’s desktop session without leveraging a local or roaming profile. It also has the ability of capturing the user’s application settings changes, storing them directly to a file share without the need of a complicated database infrastructure, which allows it to have unlimited scalability. This capability dramatically simplifies the overall management of physical of virtual desktop environments, by removing the need to store and maintain user profiles to deliver application settings, as well as eliminating user profile corruption issues.
By storing the application settings outside of the user’s profile, this allows for seamless transitions between OS versions, as the profile compatibility variable is removed.
Application Personalization:
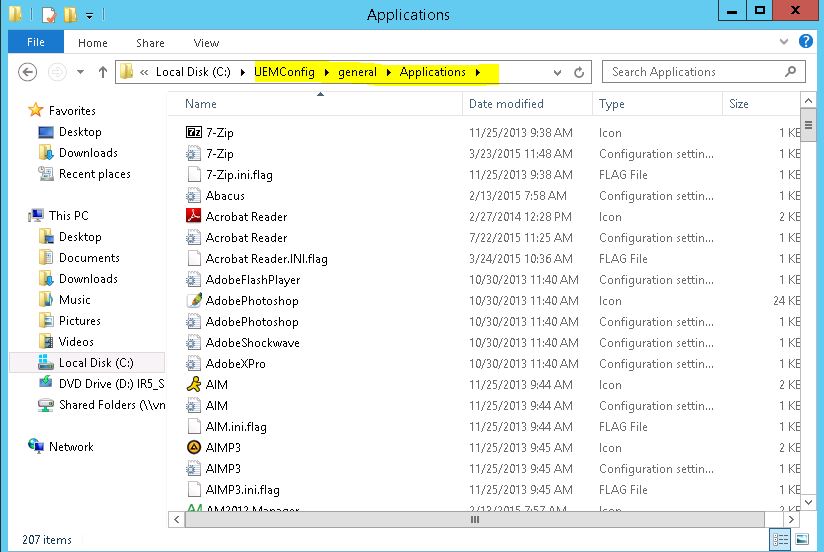
UEM leverages a whitelist approach to delivering and capturing user application settings. There is a built-in application list, that can easily be added to using the Application Profiler. Simply run the Application Profiler on a system that has the application installed, launch the application, and it will generate the necessary config files to import directly into UEM.
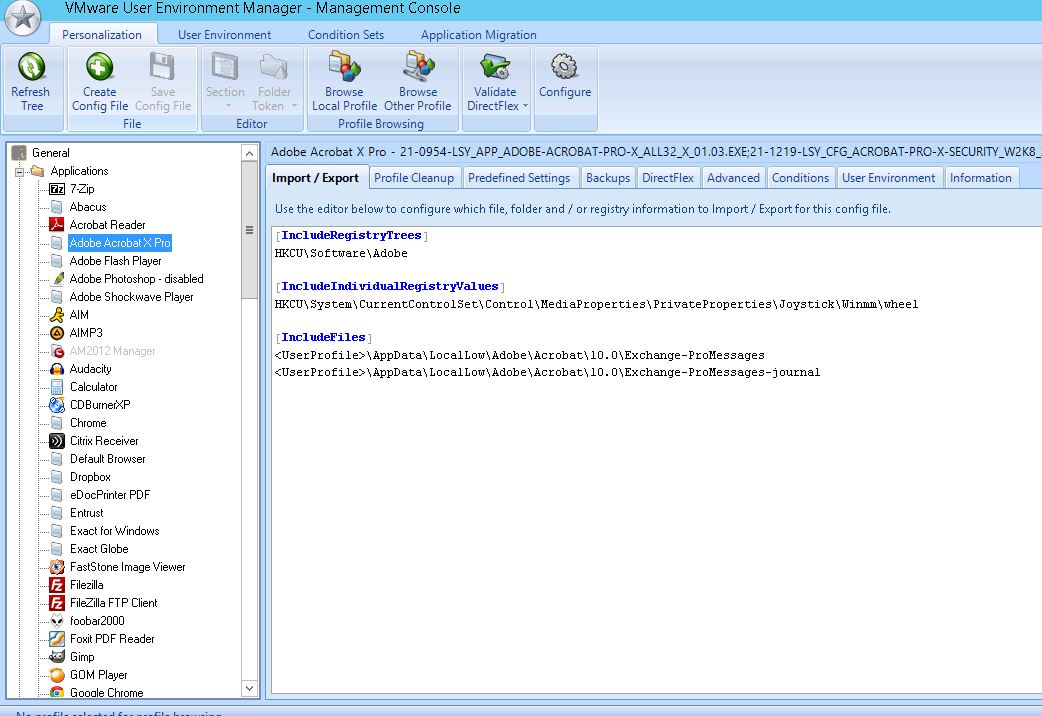
The config files will include registry entries and AppData folders where UEM will capture and push data to. If a user determines that his application settings are not being stored between sessions, you can run the Application Profiler, create the necessary configs, add them to the UEMConfig\general\Application folder, and their settings will then be captured.
Mandatory Profile Demonstration:
In our example, we will demonstrate leveraging a mandatory profile created from a Windows Default profile, for a user who has never used MS Office 2013.
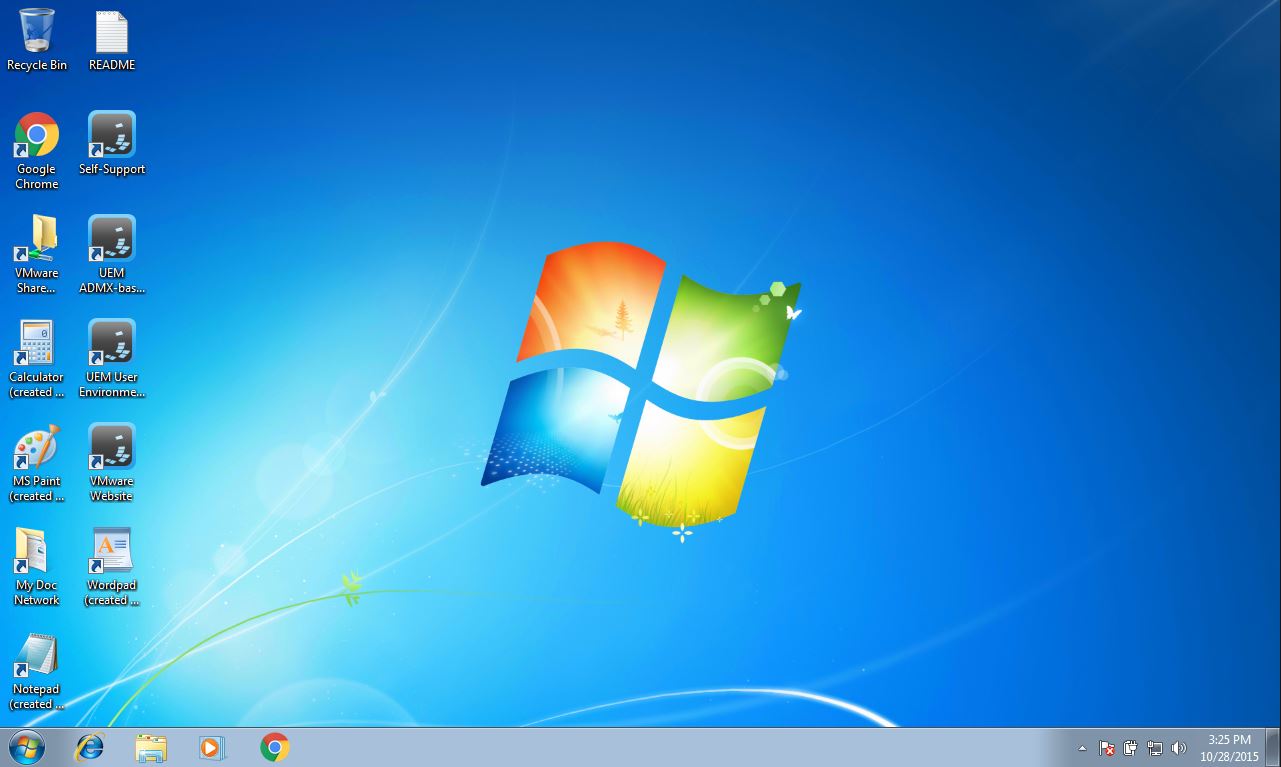
User logon:
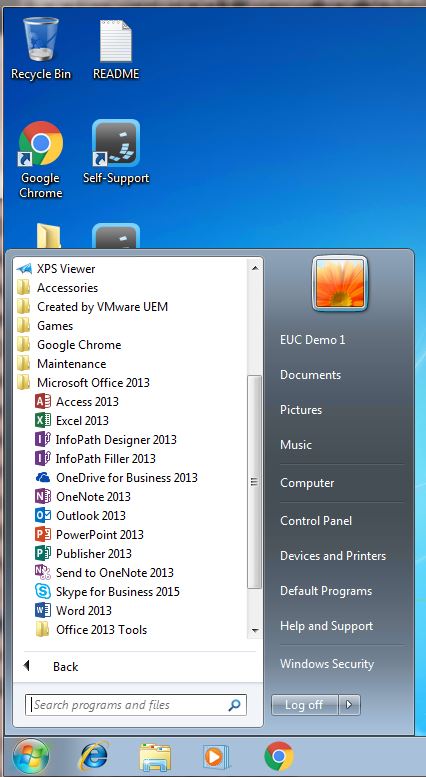
Once the user has logged in, even though they are forced to use a Default Mandatory profile, UEM has dynamically provided them shortcuts to desktop.
Even though the user has never used Word, nor is there a profile to capture or store settings, launching word from the Start Menu reveals that the user name and AD account information is automatically populated into the application, even on first launch.
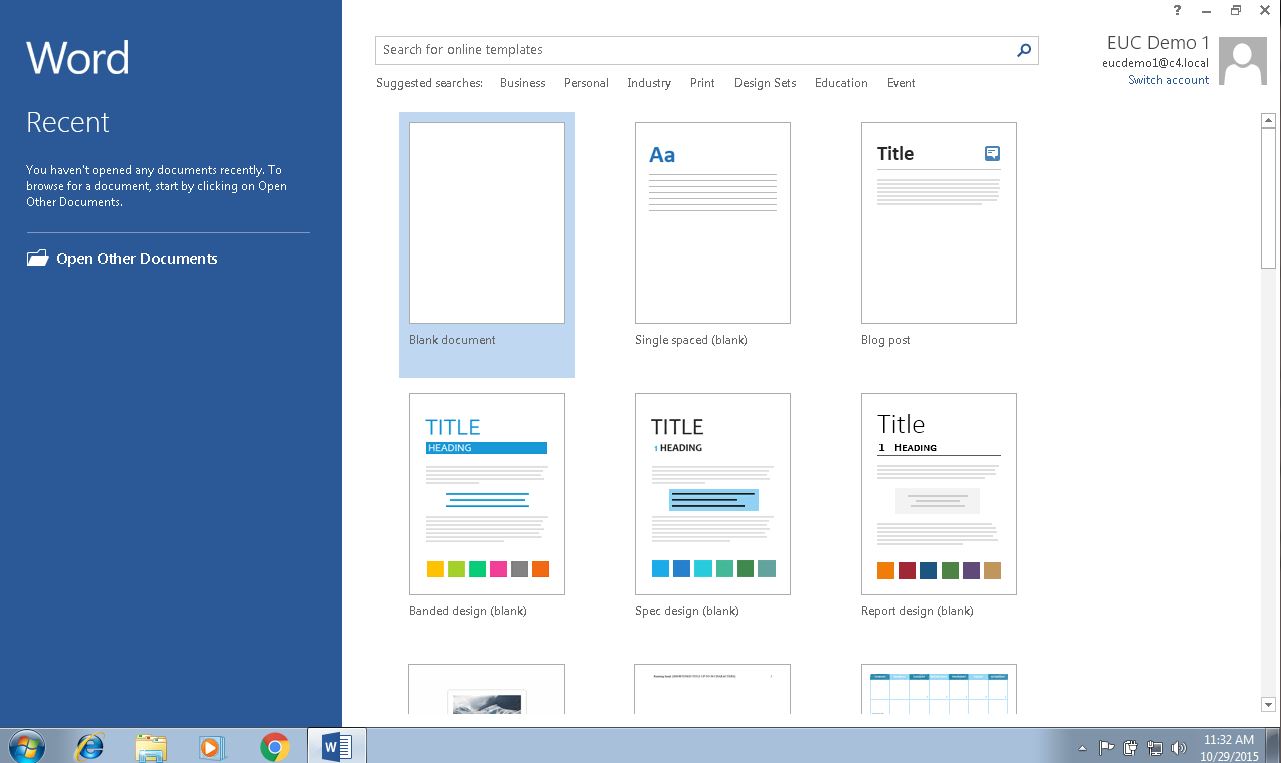

Unchecking the default options under General and logging off the machine, results in those options being stored into the User’s application settings share folder. On next logon, the unchecked General options remain for the user.

References:
User Environment Manager Administrator’s Guide: https://www.vmware.com/pdf/uem-870-admin-guide.pdf
Application Profiler Administrator’s Guide:
https://www.vmware.com/pdf/uem-870-app-profiler-admin-guide.pdf